Locks and Latches Box
Every teacher has a couple of resources that stand out as absolute ‘must-haves’ for the classroom environment. The Locks & Latches Box is one of my ‘must-haves’...and it is just as engaging and inspiring in the home!
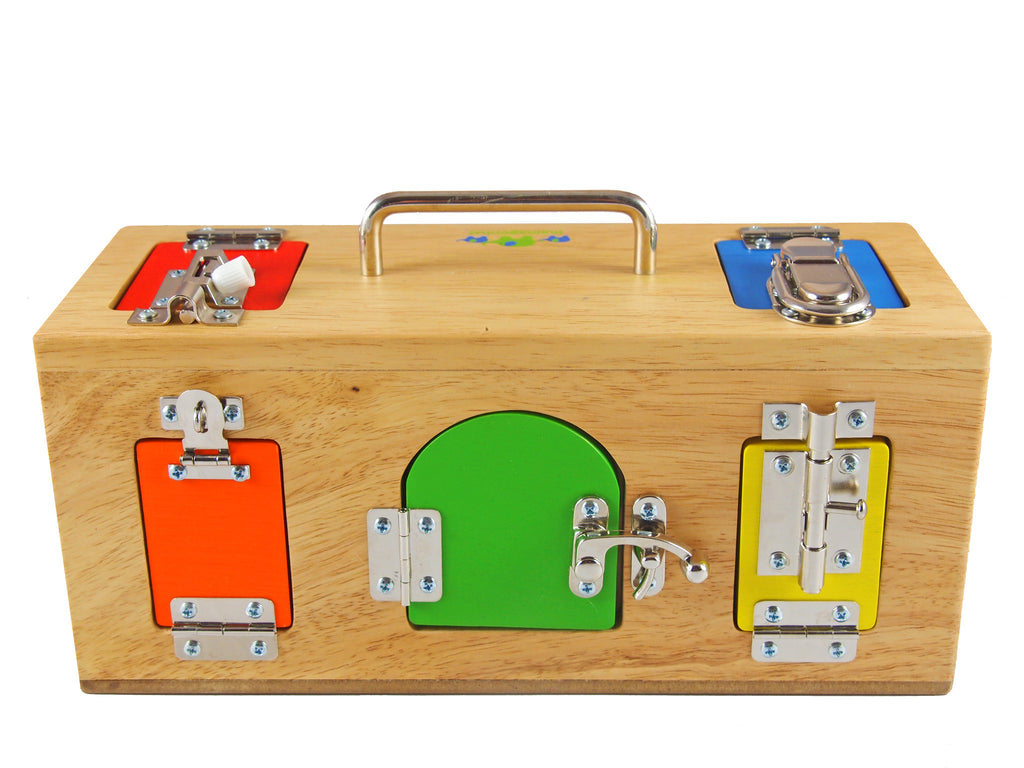
The Locks and Latches Box measures approximately 31cm x 12cm x 13cm. It features a handle at the top so that children can easily carry it from the shelf to the workspace.
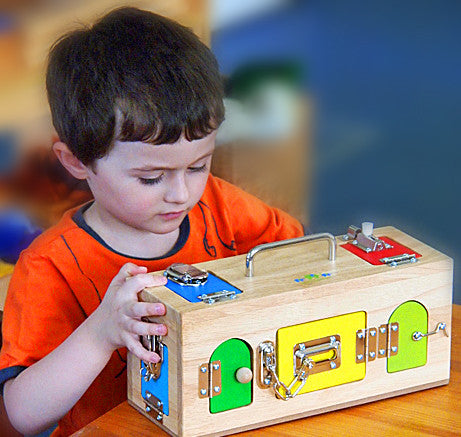
I couldn’t possibly count the number of cumulative hours of activity that this tool has inspired in my own classroom. It is particularly popular with the 2-year-old children – so much so that it was one of my ‘ace up the sleeve’ tricks for cheering up little ones who were saying goodbye to mum or dad for the first time! Even with the older Pre-school children it is just one of those eternally enjoyed objects that is constantly in use.
There are lots of features that I appreciate about the Locks & Latches Box, but here are my favourites:
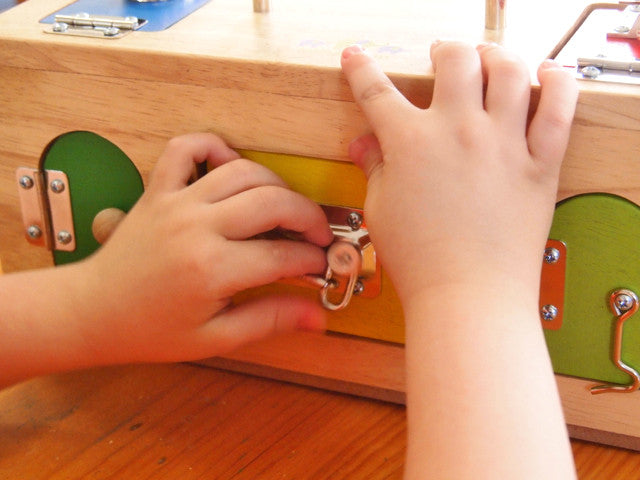
- It promotes fine-motor control and dexterity as little fingers work to open each lock and latch.
- It encourages long periods of concentration and persistent problem-solving (in my experience each child who uses this resource spends a long time on it!).
- It inspires social interaction as several children start to collaborate on opening the doors and communicating through them (this so often turns into a gorgeous ‘peek-a-boo’ game between toddlers!).

If you're looking for a slightly more colourful alternative, we do also stock the Small Red Locks & Latches Box. It has a similarly simplistic design - and does not feature any of the distracting decorations - but provides just a little extra pop of colour!

My favourite way of extending the life-span of the Locks & Latches Box is to use it as a ‘point of interest’ for other explorations. The box simply acts as a hiding place for materials that will introduce a new topic. This takes the Locks & Latches Box from being a fine-motor favourite of a tiny toddler to an engaging, educational treasure box for a Pre-schooler.
For instance you can try some of the following ideas (placed in a suggested order based on a common progression of developmental interes).
- Turn it into a Colours Box. Place several coloured objects (such as pom-poms or scarves) inside. The child can then take a ‘lucky dip’ and try to identify the colour. Alternatively the adult can request a particular colour (“Please find me something red…”) and the child checks each door to find the corresponding object.
-
Turn it into a Sensory Box. Create a great, tactile guessing game. This can be done either as an Identification Game or a Matching Game.
To play the Identification Game choose a collection of small objects from around the home or the classroom. These can be a random group (such as a pencil, a hairbrush, an apple, a spoon, a small teddy) or a collection of thematically related items (such as ‘from the garden’ – a pine cone, a stick, a leaf, a flower, a rock). Work with the child to identify each object by name while feeling it with the hands and fingertips. Then hide the objects inside the box. The child then reaches in (without peeking!) and feels an object inside the box. The child guesses the identity of the object based on these tactile impressions before pulling it out to self-correct.
To play the Matching Game a similar collection of objects can be gathered but in pairs (two shells, two pencils, two bananas and so on). Again the adult and child identify and feel each object. Then one of each pair is placed in the box while the other is retained by the adult. The adult passes one object at a time to the child and asks the child to reach into the box to find the object that feels the same. Remember that the child can assist with the process of choosing the objects! - Turn it into a Counting Box. Fill the Lock Box with a series of objects that can act as counters. The adult shows the child how to use the doors on the top of the box to reach in and access the counters. The child is then invited to count out a particular quantity of objects. This invitation could be a prompt from the adult (“Please collect six counters for me…”) or could be inspired by number cards (or just numbers written on paper!) that the child picks out before each turn.
- Turn it into a Rhyme Box. Choose a set of objects that represent rhyming pairs. When you first start you might like to keep the quantity limited to just a few pairs, for instance: a cat and a hat (a small toy hat!), a dog and a frog, a hen and a pen. Place these objects inside the Lock Box and invite the child to reach in through one door to pull out an object. Identify the object by its name and help emphasise the end sound (“you chose a cat”) then invite the child to open the doors until he or she can see something rhyming with cat. The child then searches the treasure box, peeking through the various doors, until he or she spots the ‘hat’. Put the rhyming pair together and repeat the process until all are matched! When the child is successfully matching the rhyming pairs then you can start introducing more pairs to make the exercise more challenging.
- Turn it into an Initial Sounds Box. Collect a group of objects each with a prominent and distinct initial sound (such as a toy dog, a cup, a ribbon, a spoon and an apple). Identify the objects first, ensuring that you clearly enunciate and emphasise that initial sound. Then hide the objects inside the box and invite the child to find the object that starts with a specific sound (such as, “Please find me something starting with s…”).
The sky is the limit for these treasure-chest activities. Between your own ingenuity, and your observations of the creativity of the child, you will no doubt discover many more applications!